1st finished project of 2015 PART 3
どうも!Welcome back and I am glad that I am not boring anyone.
I never expected this will become a series of TL;DR logs but hope I can still give new info for builders to use in their projects. So here we go, HGUC 1/144 RX-78-GP02A MLRS, 出撃!
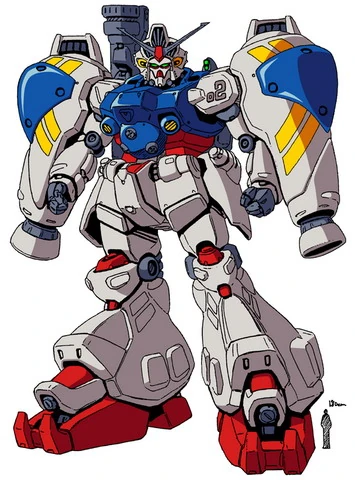 |
| Pic taken from Gundam Wikia |
For part 1, CLICK HERE
For part 2, CLICK HERE
For some strange reason in the Painting section of this project, I forgot to include how I painted those very prominent blue shoulder panels on those shoulder binders. So I guess let's start from there.
Them blue shoulder panels
For the GP02, anyone will, surely, first notice those large shoulder binders. Carrying three huge-ass thrusters (on each binder), the GP02 uses these binders to counter the damn recoil of the atomic bazooka and also the blast and shockwave that it will have to face once it delivers its payload. These are also what give the GP02 good maneuverability that makes this bulky mobile suit still a deadly weapon in CQB situations - coupled with Anavel's piloting skills and passion, the GP02 is truly a monster worth Gundam-jacking. Now, what makes the binders even more prominent, is the blue shoulder panel on each binder. It gives a builder a perfect opportunity to make the GP02 they are building truly unique, one that a builder can call his own. Given so, I decided to candy those babies up. I thought that a glossy, candy effect on those panels will have a nice contrast against the flat coated armor parts and I am glad it did not fail.The first step you must make is to spray/airbrush a gloss black paint over the piece. What I did is use the same Bosny Black, mix in a lacquer retardant and airbrush it at very low PSI (8PSI). Your aim is to provide a VERY GLOSSY base coat for the next paint you will be using. Using that method I mentioned, I was able to produce an almost mirror finish(it's only high-gloss, but I can already see a nice reflection) black base coat using just an ordinary paint.

Another way is you can use Alclad II Black Gloss Base (named something like that) as your gloss base. Another popular method is to use an Enamel Gloss Black paint to make a glossy base as enamels have the best levelling property. Alclads and Enamels are best when airbrushed, by the way.

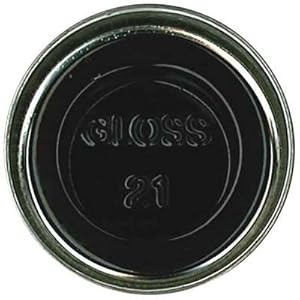 |
| Humbrol Enamel - Gloss Black |
Common choice for candy-effects is to use silver or chrome. Spraying silver over a glossy black surface will help your silver color achieve a mirror-like texture and surface. I also tried using a decanted Bosny Aluminim Silver for candy-effects. For me, Bosny's aluminum silver is the best looking silver by Bosny, so hope you take that into consideration. Despite that, I wanted to try a new paint I got from JMN Hobby; they got a fresh shipment of Alclads and I wanted to try an Alclad for once and so I got this Alclad II Polished Aluminum.
 |
| The small bottle on the left is the Polished Aluminum |
 |
| Metallization done |
Moving forward, to finish the candy effect I again decanted paint. This time Bosny Honda Blue.
 |
| I forgot which Honda Blue number I used, but I guess any will work well |
 |
| Using Honda Blue and Red The Honda Blue here is not that glossy - I discovered an airbrushing technique that helped produce the maximum glossiness possible. |
Here is the result for the shoulder panels:


Finally, I think from this, I think I basically covered my painting process already. The next step is what I call pre-finishing.
Pre-Finishing
In this stage, my aim is to seal and protect the paint job I have worked hard for. This is to protect the paint job from scratches and damages that might result from handling it during decalling, panel lining and final assembly. For this stage, I always pre-finish using a gloss clear coat. Furthermore, I usually use a weak gloss coat, meaning I usually do not use a lacquer-based gloss coat as it might react with other layers of paint under it.So why do I use gloss coats for pre-finishing? Because gloss is perfect for panel lining (may it be enamel washing, using pigment ink markers or real touch markers), it also provides a great smooth surface for when you use water-slide decals (which I did use).
Going back to the type of gloss coat, I decided to use an acrylic-based one. One brand you can use is Tamiya Clear (from the bottles, not the spraycan type). One candidate that I thought of using is Vallejo Acrylic Clear Varnish:


What are the other uses of Pledge WnS?
- Got an old built kit with loose polycaps? Dab a coat of WnS inside the polycap and it should be better than new.
- Want to protect your applied water-slide decal from silvering? Airbrush or brush on a coat of WnS and it should be okay from then on.
- Want to protect enamels from being dissolved by lacquers? You can use this too (again, make sure the enamel cured properly first). At any rate, WnS can also protect any type of paint under it.
- WnS will make your Bandai kit feel like a Daban Model kit specially on the arm or leg pegs. If you apply this on the pegs (like pegs that connects the whole arm to the torso), it will become super tight and might cause stress on the plastic and even breakage. So either mask the pegs out or sand them down to provide room for the extra thickness that WnS will result with.
- Do not over-spray this. Spray it at low air pressures (0.5bar) and don't spray too close use the normal 6-inch to 12-inch distance. If this pools on a surface, it does not create a crater like what happens with normal paints, rather it will try to level it self even but due to its quick-drying properties, you might end up with an uneven coating where you can see waves of the WnS as it slides down the surface of your plastic and believe me, it will dry that way in a few seconds.
- WnS might have some negative reactions with decal solutions (e.g. Mr. Mark setter and Softer, etc) - I experienced Mr Mark Setter drying into a milky film and I think it has something to do with the Mark Setter reacting with the Wipe n Shine. It is easily corrected by brushing Mr Mark Softer over those areas.
- Its quick-drying property is double-edged. It is good that you'll be able to handle the parts in just a few minutes but that is also something to be wary of. Remember that I said you should let your paint fully cure first? This is the reason. A paint that is not yet fully cured is still too pliable and flexible as it is still trying to take a good grip of the surface and trying to level down to the best that it can. If you apply WnS on an uncured paint, it will grab on to the paint surface and as it dries very quickly, it will contract as it levels down. Since your paint has not yet established its grip on to the kit, WnS will pull and tear you paint, creating cracks or ridges on the paint surface and this might not be what you want. Though I would say that behavior can be something that can be put to use in certain effects you might want.
|
| The lines have more interesting patterns on other angles. |

Okay now, that's basically all I can say about pre-finishing. Next step is decalling and I believe even beginners already knows this but I will share on the next part what I used for setting the decals and what decals I actually used.
Again, thanks for showing interest in reading this log and hope you stay for the coming next part.
Thank you very much and I hope I can still give you something new in the next one.
またヨロシク!
I paint with acrylics and oils on my RESIN pieces what is the BEST for this ---I want a CLEAR HIGH GLOSS Shine that will NOT crack or chip or yellow--my piece are for key chains --Thanks
ReplyDeleteCan the simple green can clean all type of paint in airbrush. Acrylic, lacquer and enamel? Tia
ReplyDeleteCan the simple green can clean all type of paint in airbrush. Acrylic, lacquer and enamel? Tia
ReplyDeleteHello i also use decanted bosny. About the lacquer retardant is it the lacquer flo?
ReplyDelete